How to take Instagram-worthy photos in five easy steps
Love to give your Instagram grid an influencer-style makeover? Digital marketing consultant Kerry Coleman reveals how to take Instagram-worthy photos in five easy steps.
Instagram has been around for almost a decade and has over a billion accounts worldwide. About 25 million of those are businesses just like yours and with up to 400 million active users every day it is certainly leading the way when it comes to helping brands connect with their ideal audience.
Built to be a photo sharing platform, compared to other social media channels, it is by far the best when it comes to picture quality.
Images are less likely to be distorted or compressed on Instagram, making it the perfect shop window to visually show off your brand story.
I got help to compose an aspirational Instagram grid
When it comes to mastering the social media game, composing a beautiful aspirational grid on Instagram is in my opinion what we should all be aiming for. However, like many of you I don’t have the luxury of having a professional photographer at my beck and call to snap a few shots every time I need to schedule some posts.
For that very reason, I recently asked Stephen McGrath, Creative Videographer and Photographer based in Wiltshire for his expert advice and guidance on the matter.
Chatting over coffee, it turned out I wasn’t the first person to ask him for help on this subject, and thanks to Stephen I came away with a notebook full of handy hints and simple tips on how to take great Instagram worthy photos to share with you.
How to take Instagram-worthy photos in five easy steps
If you don’t want to rely on an Instagram followers app to grow your account, then you need to ensure the quality of your photos is as hung as possible. And to help you make sure your Instagram photos are share-worthy, here are five simple steps you need to take.
1) Get the right light
Get this right and the rest will follow. Using light will give shape and depth to your images, whether that is using a light source or shooting in natural light.
If you’re looking for a soft shadow look and you’re outdoors on a bright day, then get yourself in the shade. If on the other hand you’re working indoors then setting up near a window without direct sunlight is ideal.
For the best results, shoot on a grey overcast day. Clouds are most definitely your friends when it comes to capturing that perfect image as they act as a giant diffuser keeping shadows to a minimum.
2) Get the right look
When it comes to the style of your images, think about the story you are telling, and choose a look that complements the mood and feel you are wanting to create, as well as the personality of your brand.
If you are not sure, do some research on line and see what images inspire you. It can be hugely insightful to create a mood board for your brand bringing together the components that will make it work. The time and effort you go to creating this will not go to waste as it will serve you well when it comes to generating more content and images later.
If it’s props you’re after, Bric-a-Brac stores are a great place to find these and it’s always worth asking the owners if you can rent the items for a few days if you don’t want to clutter up your workspace.
3) Get the right angle
Once you have chosen your setting, gathered up all your props, and found the right background to create the right look, you’re ready to choose a point of view to shoot from, be it a straight shot, 45˚ angle or a flat lay.
If you are taking a photograph of product or props lay them out in a way that brings the focus to a key object. Together with the right lighting this can be achieved by using the “rule of thirds.” Without getting too technical, to apply the “rule of thirds” imagine a 3×3 grid and place the points of interest along the lines or intersection points of your grid.
Photos are set up in this way are much more pleasing on the eye and the great news is that your smart phone has a grid tool in your camera settings, making it much easier to apply this rule to your images.
For straight on and 45˚ angle shots, consider your depth of field as you are likely to have limited control over this using the camera on your phone.
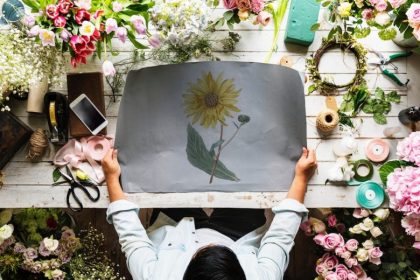
For a flat lay it works well to fill the frame and overflow the edge of the image.
Don’t be disheartened if you don’t get it all this right first time. Experiment by trying various angles and think about repositioning your products or props until you have achieved the look you are after.
4) Get the right kit
You don’t necessarily need to blow the budget on some fancy photography kit. When used in the right way the camera on your smart phone is enough to produce eye catching images worthy to post on your Instagram account, as long as you are willing to take your time to carefully construct and plan them.
Along with a host of other editing tools, your smart phone has the technology to adjust the exposure of your image. You simply hold your finger on the screen when it is in camera mode and this will lock the exposure. By sliding your finger up and down you can change the exposure to your liking.
5) Get the right end result
It is always a good idea to get as much right when you first take the photo in terms of the lighting and overall composition. That said a quick tweak in an editor can make all the difference.
Windows, Mac OS, Mac iOS and Android all have access to free photo editing tools; and subject to the story and mood you are trying to achieve; muting or saturating colours, lifting shadows or dulling highlights can all add to the final image.
For mobile devices, give the Snapseedapp a try. It’s free and extremely powerful, so go careful, and don’t be tempted to overdo things.
Experiment until you find the right look for your Instagram photos
Nothing beats practice and experimenting with your angles, lighting, and composition when it comes to taking fabulous Instagram worthy photos.
If you have any questions on anything I have covered, I can certainly recommend Stephen McGrath, he is a great teacher, and enormously talented. If you are interested to find out more about his one to one tutorials, mentorship or workshops on product photography, lighting and post processing, drop him an email.
Kerry Coleman is an experienced digital marketing consultant and social media expert for luxury, premium brands.
Photo by Sandrachile .


