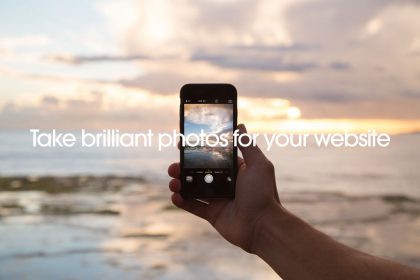
Easy tips and tricks to help you look good in photos every time!

Hate yourself in photos? Need professional shots for your career or business but convinced you’re not photogenic? Learn how to look good in photos every time!
Olga Hoffman is a mum and professional photographer for clients including Marie Claire, Elle and InStyle magazine. She also teaches other mums how to take great pictures of themselves and their families through her online iKids Photo Course.
But today, in the first of a three-part photography guide for us, she’s sharing her wisdom to help you understand how to find your ‘angles’ and pick the perfect lighting so you can take professional photos you’ll be proud of.
Do you hate the way you look in photos?
Do you freeze when someone takes a picture of you? Then, when you need the right picture to put on your LinkedIn profile or business website or blog, do you feel hopeless because you don’t like how you look in any of them?
If so, you’re not alone! In fact, this is such a common issue with many of the people I speak to that I have created a simple guide with hints and tricks to help you take pictures you’ll be proud to share.
Three photography secrets revealed!
Before I start I would like to reveal three secrets, or rather, change a common way of thinking. You see, despite what you may believe, everyone can be photogenic – you just need to find the right light, relax and know how to pose.
The second secret is that many public figures, especially celebrities, use a coach who teaches them how to pose. They practice their signature pose for years and whenever a photographer appears, they strike that well-rehearsed pose. That is why they look so great in most of their pictures.
And finally, the reality (even for top models) is that you need to take a lot of pictures to get just one good one. Professional photographers take dozens of photos before they are satisfied they have ‘the one’.
How to find your angles
So, with that out of the way, how can you learn how to look confident and relaxed in pictures? The first thing you need to get right are your ‘angles’.
The main problem with most of us when we pose for photos is that we usually keep our head straight up or even tipped back – a position that makes us look unfairly unattractive. Instead, we need to find the right head position and create a nice jaw line. When you get the jaw line right, it will eliminate any second chin and, more importantly, it hides some of your neck.
To get the ‘right’ jaw, you need to stretch your neck and then tilt the forehead forwards and put the chin down a little bit. At first this might feel a bit uncomfortable and strange but believe me, it does work.
Once you’ve got your jaw line right, you need to work on the position of your shoulders. Depending on your body structure, you might look better with your shoulders angled to the left or right. I prefer to keep my shoulders straight for head shots, and for half body shots slightly towards the right.
However, it is a very personal choice. So before taking a photo, practice in front of the mirror – take some snap shots with your smartphone and decide which angle makes you feel the most comfortable.
The final element is your face angle. Turn your head left, then right, put your chin a bit down, and again take some snapshots at each position. You will immediately see which angle suited you the best.
When you have chosen what you think is your best pose, practice and stick to it. So you will always know what to do when you are being photographed.
How to get a natural facial expression
Before I show you how to get a natural facial expression, I will strongly advise you to avoid using the word cheese! It will only produce a fake and unnatural smile.
To get a natural, positive, facial expression you actually need to feel it, not fake it. There are many different ways of achieving this. If you know how to meditate, do it for a few minutes. You can also close your eyes, think about the last thing which made you laugh; then open your eyes – this is a perfect moment to take a picture.
Personally, for me squeezing my face works the best. I squeeze, relax and then take a picture. If you try it, make sure that you don’t wear make-up. Look at the pictures to see the results.
How to get your lighting right
Light can make or break your portrait – it can make you look beautiful and flattering, or tired and unattractive.
First of all I will tell you what kind of light to avoid. House light is most definitely not good for a portrait because it comes from above and will create ugly shadows under your eyes and chin. It also gives a yellow or orange tint to your face, and the pictures will look very grainy.
Flash light is also very unflattering because it will make you look pale or washed out, and it will create shadows under your nose, chin and behind you. So, if you can, turn off the flash on your camera.
If you want to ensure your skin looks lovely and smooth in photos, take them in the natural light of overcast weather. It is not very flattering, but it is soft and free from harsh shadows. And if you do take pictures inside, make sure that you are standing in front of a window.
If you want to take pictures during sunny weather, do it very early in the morning, or just before sunset when sun is low and not that strong. If you want to shoot during the day find some shade, such as a tree or gazebo.
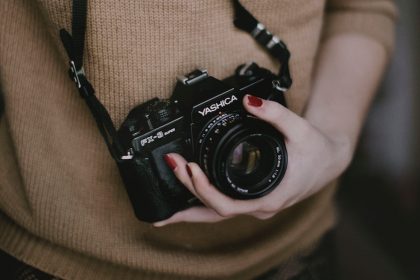
How to set up your camera
If you have only a smartphone camera, that’s fine. When you take a selfie make sure that you hold it at least 50cm from your face and hold it at your eye level or slightly above. Never photograph from below, it will make you look disproportional.
If you can use a professional camera, then do. Just make sure that you are not using AUTO mode. Change to portrait mode if your camera has this option. You can also use aperture priority mode (check in your camera manual for how to switch to this mode) and open the aperture as much as you can, at least up to f4.5.
In both cases you will get a blurry background and you will stand out more in the pictures. Put your camera on a tripod or ask a friend or family member to take a picture of you.
How to decide on your ‘look’
How you want to look in your photos depends on your profession. You need to choose the right outfit and location to convey your business message.
For example, I am a mum and a photographer. I teach other mums photography. So I can look more relaxed in my picture. However, if you are in the banking business, it’s probably a wise idea to wear a more professional outfit and choose an office-like background.
Make sure that the background in your photo is tidy; a mess will take the focus away from you. If you use a smartphone get a selfie stick, or make sure that you crop the picture in postproduction, so your arm doesn’t show.
This is the first of a series of three articles designed to give you a DIY guide to photography – and help you have a more professional online presence as a result.
In part two of this three-part guide, I’ll show you how to take good quality lifestyle pictures for your blog or your website, and in the third I’ll teach you how to prepare your photos for posting online.
Want more photography hints and tricks? Find out how to take stunning pictures of your family and children, in this free ebook – download now!