What to do when you need emergency HVAC repair

Few scenarios are as disruptive as your air conditioner failing unexpectedly, especially during peak season. When facing a sudden loss of cooling, the thought of an emergency HVAC repair can be daunting. However, we know that not every AC breakdown immediately requires a professional service call. Many common issues can be resolved with some basic AC troubleshooting tips before calling a pro. This guide aims to empower homeowners to perform initial diagnostics, helping you identify whether your system needs a simple fix or if it’s truly time for urgent professional assistance.
To understand comprehensive HVAC care, explore our HVAC maintenance insights, and for immediate assistance, contact our team today.

Signs You Need Immediate Emergency HVAC Repair
While many AC issues can be addressed with simple troubleshooting, certain symptoms signal a more serious problem that warrants immediate professional attention. Recognizing these signs can prevent further damage to your system and ensure the safety of your home.
One of the most concerning indicators is the presence of burning odors. If you smell something akin to scorching plastic or electrical wiring, it’s crucial to shut down your system immediately at the thermostat and the circuit breaker. This could indicate an electrical short, a burning motor, or damaged wiring, all of which pose a significant fire hazard. Similarly, if you observe electrical sparks coming from your unit, particularly the outdoor condenser, do not attempt to troubleshoot it yourself. This is a clear sign of a severe electrical fault.
Another critical sign is a refrigerant leak. While you can’t directly see refrigerant, signs like a frozen evaporator coil (the indoor unit’s coil) or a persistent hissing sound might suggest a leak. A healthy central AC compressor should draw about 8 to 10 amps; anything above that could indicate failing components or a system working too hard due to issues like low refrigerant. Refrigerant leaks not only impair cooling but also release harmful chemicals. If your indoor coil is covered in ice, it often points to low refrigerant levels or severely restricted airflow. Attempting to thaw it yourself is a temporary fix; the underlying issue, likely a leak, needs professional repair.
Water pooling around your indoor unit, beyond a small drip, can also be an emergency. While sometimes due to a clogged condensate drain, which you might address, excessive leakage can indicate a frozen coil that has thawed, a cracked drain pan, or even a refrigerant leak. Water leaks account for almost 90% of all central air service calls, highlighting their prevalence and potential for significant water damage if ignored.
Finally, if your AC unit is short cycling – turning on and off frequently without completing a full cooling cycle – it could be struggling due to a variety of issues, from a dirty filter to an undersized unit, or even a failing compressor. While a dirty filter is a common culprit, persistent short cycling can quickly lead to compressor failure, one of the most expensive repairs. If you suspect compressor failure (e.g., the outdoor unit hums but doesn’t spin, or makes loud grinding noises), it’s time to call a professional.
To help differentiate between issues you might tackle and those requiring immediate professional help, consider the following:
Simple DIY Troubleshooting (Before Calling a Pro) Immediate Emergency Issues (Call a Pro Now) Thermostat battery replacement Burning odors or electrical sparks Tripped circuit breaker reset Refrigerant leaks (hissing, frozen coil) Dirty air filter replacement Excessive water pooling (beyond minor drip) Clearing debris from outdoor unit Compressor failure (loud noises, no cooling) Unblocking supply vents Gas leaks (rotten egg smell) Clearing minor condensate drain clogs Carbon monoxide alarm sounding System not turning on (no power) Repeated circuit breaker trips AC blowing warm air (check settings) System is over 12 years old with frequent issues Safety Hazards Requiring Emergency HVAC Repair
When it comes to your HVAC system, safety should always be the top priority. Certain malfunctions pose immediate risks to life and property, demanding prompt professional intervention. The most critical safety hazard is a gas leak, particularly if you have a furnace or heat pump that uses natural gas. The tell-tale sign of a gas leak is often a strong “rotten egg” smell. If you detect this odor, evacuate your home immediately, do not operate any electrical switches or appliances, and call your gas company and emergency services from a safe location.
Carbon monoxide (CO) leaks are another silent but deadly threat. This odorless, colorless gas can be produced by faulty combustion in furnaces. If your carbon monoxide detector alarms, get everyone out of the house and call emergency services. Never ignore a CO alarm.
Electrical issues present a significant fire risk. If you notice electrical sparks, a smoking motor, or scorched wiring anywhere near your HVAC unit, shut off the power to the unit at the main electrical panel immediately. These are clear indicators of severe electrical faults that require a licensed technician to diagnose and repair. Repeatedly resetting a circuit breaker that keeps tripping is also dangerous; it signals an underlying electrical problem that could lead to overheating or fire. Ignoring these signs or attempting advanced electrical repairs yourself can have catastrophic consequences.
Mechanical Failures That Halt System Cooling
Beyond immediate safety hazards, certain mechanical failures can bring your AC system to a complete halt, requiring professional expertise. A seized compressor, for instance, means the heart of your cooling system has failed. You might hear a loud hum but no fan movement from the outdoor unit, or the unit might simply fail to turn on. Compressor replacement is one of the most complex and costly repairs, definitely a job for a professional.
The blower motor, responsible for circulating air throughout your home, is another critical component. If the blower motor breaks down, you’ll feel little to no airflow from your vents, even if the outdoor unit seems to be running. This not only makes your home uncomfortable but can also lead to the evaporator coil freezing over due to lack of air movement.
A broken fan blade, either in the outdoor condenser unit or the indoor air handler, can cause loud banging or rattling noises. If the outdoor fan isn’t spinning, the condenser coils can’t dissipate heat, leading to inefficient cooling and potential system overheating. Continuing to run a unit with a broken fan blade can cause further damage to the motor or other internal components.
Capacitors are small but vital electrical components that provide the initial jolt of electricity needed to start motors (like the compressor or fan motors). A failed capacitor can prevent your unit from starting or cause it to hum without operating. While a professional can replace a capacitor relatively quickly, diagnosing it correctly and handling the high voltage safely requires expertise.
Finally, issues like high amperage draws in components or a freezing line set (the insulated copper tubing connecting indoor and outdoor units) point to deeper problems like refrigerant issues, compressor strain, or airflow restrictions. These often require specialized tools and knowledge to diagnose and rectify.
Critical DIY Checks to Complete Before Calling for Help
Before picking up the phone for a professional, there are several AC troubleshooting tips before calling a pro that you can perform yourself. These checks are simple, require minimal tools, and often resolve common issues, saving you both time and money. Many homeowners are surprised to find that a seemingly major breakdown was due to a simple oversight.
Start with the basics: a system reset. Sometimes, just like a computer, your HVAC system needs a reboot. Turn off your AC at the thermostat, then locate the circuit breaker for your indoor and outdoor units (they might be labeled “AC,” “Furnace,” or “HVAC”). Flip both breakers to the “off” position, wait for 5-10 minutes, and then flip them back “on.” Return to your thermostat, set it to “cool,” and lower the temperature significantly to see if the system kicks back into action. This power cycling can clear minor electrical glitches.
Beyond a simple reset, regular basic maintenance is key to preventing many emergency situations. For instance, did you know that nine times out of ten, calls about central air units that aren’t working well are because of a dirty filter? This simple oversight can lead to a cascade of problems, from reduced efficiency to frozen coils. Engaging in proactive checks can drastically reduce the need for urgent service. If you’re ever in doubt about performing certain tasks or need help with more complex repairs, resources for emergency repairs and plumbing services are available to guide you.
Inspecting Thermostats and Electrical Disconnects
Your thermostat is the command center for your HVAC system, and often, it’s the first place to look when things go wrong. Start by ensuring it’s set to the correct mode (“Cool”) and that the fan is set to “Auto” (not “On,” which will run the fan continuously even when the compressor isn’t cooling). Double-check the temperature setting – it should be set at least 3-5 degrees below the current room temperature to trigger the cooling cycle. An often-overlooked issue is dead batteries; if your digital thermostat display is blank or flickering, try replacing the batteries.
Next, move to your electrical system. Locate your main electrical panel, usually in your garage, basement, or utility closet. Look for any tripped circuit breakers related to your HVAC system (they’ll be in the “off” or middle position). Flip any tripped breakers firmly to the “off” position, then back to “on.” If a breaker immediately trips again, do not continue resetting it; this indicates a deeper electrical issue that needs professional attention.
Finally, check the outdoor electrical disconnect switch, typically a small gray box mounted on the wall near your outdoor condenser unit. Ensure the switch inside is in the “on” position, or if it’s a pull-out fuse block, that it’s properly seated. Some disconnects contain cartridge fuses; if these are blown, they’ll need to be replaced. Always exercise caution around electrical components and consider shutting off power at the main panel before inspecting the outdoor disconnect.
Clearing Airflow Restrictions and Frozen Coils
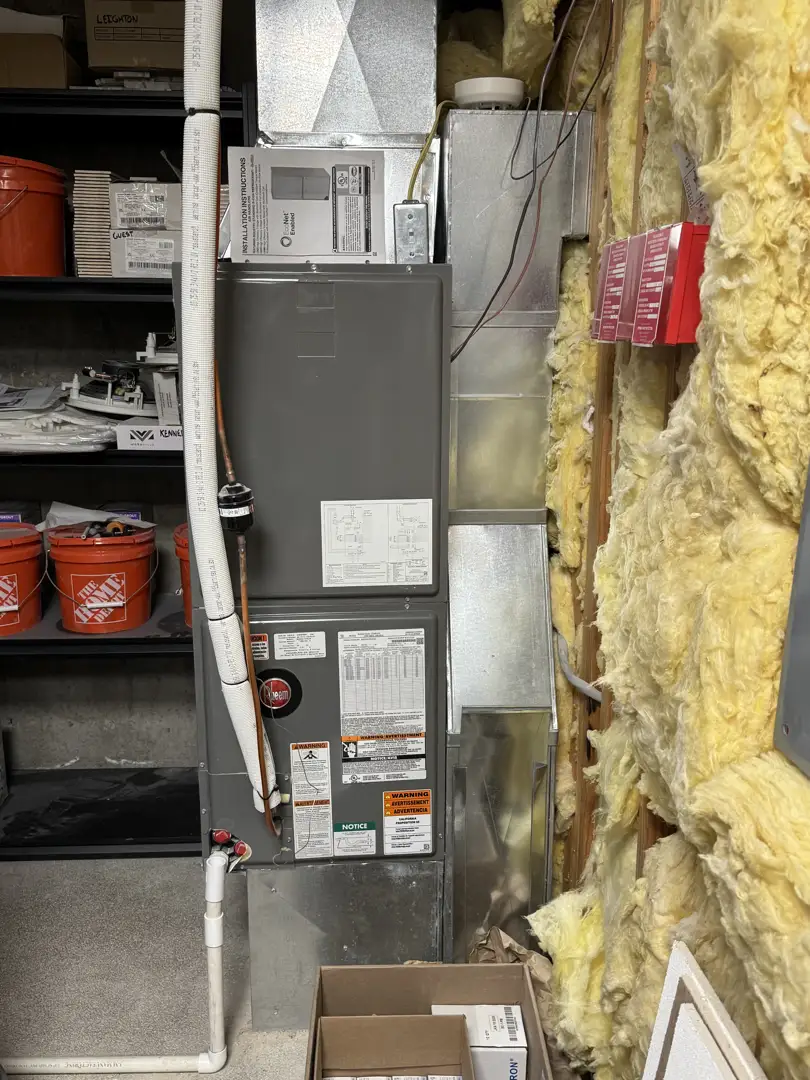
Restricted airflow is a leading cause of AC problems, often leading to reduced efficiency and even system failure. The most common culprit is a dirty air filter. HVAC filters can last anywhere from 3 to 12 months, but they need more frequent changes if you have pets or high usage. Locate your air filter (usually in a return air vent or inside the air handler/furnace cabinet), slide it out, and inspect it. If you can’t see light through it, it’s time for a replacement. Make sure to insert the new filter with the airflow arrow pointing in the correct direction, towards the air handler.
Beyond the filter, check your return air registers and supply vents throughout your home. Ensure they are open and unobstructed by furniture, curtains, or rugs. Keep furniture and plants at least two feet away from vents to allow for proper air circulation. Blocked vents can create pressure imbalances in your ductwork, forcing your system to work harder and potentially causing long-term damage.
A frozen evaporator coil, often visible as ice buildup on the indoor unit’s copper lines or the coil itself, is almost always a symptom of poor airflow or low refrigerant. If you find a frozen coil, immediately turn off your AC unit at the thermostat. Set the fan to “On” (blower only) to help melt the ice faster. Place towels around the unit to catch any meltwater. Never try to chip away the ice, as this can damage the delicate fins or puncture the refrigerant lines. Once the coil has completely thawed (which can take 2-4 hours), replace your air filter if it’s dirty, ensure all vents are open, and then restart your system. If the coil refreezes, it’s a strong indicator of a refrigerant issue or a persistent airflow problem that requires professional diagnosis.
Addressing Condensate Drain Backups and Leaks
Your AC system doesn’t just cool your home; it also removes humidity. As warm, humid air passes over the cold evaporator coil, moisture condenses and drips into a drain pan, then flows out through a condensate drain line. Over time, this line can become clogged with algae, mold, or dirt, causing water to back up into the drain pan. When the pan overflows, it can trigger a float switch that shuts down your AC to prevent water damage, or it can simply cause leaks.
If you notice water pooling around your indoor unit, or if your AC suddenly stops working on a humid day, a clogged condensate drain is a likely culprit. To address this, you can try clearing the clog yourself. First, locate the condensate drain line, which is usually a PVC pipe extending from your indoor unit to the outside of your home or to a utility sink.
One common method is to use a wet/dry vacuum. Attach the vacuum hose to the outdoor end of the condensate line and create a tight seal (you might need duct tape). Run the vacuum for several minutes to suction out the clog. Alternatively, you can locate the access point on the indoor unit (often a T-shaped vent in the PVC pipe) and pour a mixture of 1/4 cup of distilled white vinegar (or a small amount of bleach) mixed with water into the line. Let it sit for about 30 minutes to dissolve any buildup, then flush with plain water.
To prevent future clogs, pour a cup of white vinegar down the condensate line access point monthly during the cooling season. You can also use condensate drain line tablets in your drain pan. If the drain line repeatedly clogs, or if you suspect the float switch itself is faulty, it’s best to call a professional. Water leaks account for almost 90% of all central air service calls, so addressing this promptly is crucial.
How to Safely Stabilize Your Home While Awaiting Service
When your AC system falters, especially during extreme temperatures, maintaining a comfortable and safe indoor environment while you await professional service is paramount. The goal is to minimize heat gain and manage indoor humidity as effectively as possible.
Start by closing all windows and doors to prevent outdoor heat and humidity from entering your home. Draw curtains, blinds, or shades, especially on west-facing windows, to block direct sunlight and reduce heat gain. If you have awnings, deploy them.
Utilize portable fans to create airflow and a wind-chill effect. Position them strategically to circulate air within occupied rooms, rather than just blowing hot air around. If you can, create cross-ventilation by opening windows on opposite sides of the house during the cooler parts of the day (early morning or late evening), but close them again once outdoor temperatures rise.
Consider the needs of vulnerable occupants, such as infants, the elderly, or individuals with health conditions, who are more susceptible to heat-related illnesses. Ensure they stay hydrated and have access to the coolest parts of the home. If indoor temperatures become dangerously high, consider relocating to a cooler environment, such as a community cooling center or a friend’s home, until your AC is repaired. Avoid using heat-generating appliances like ovens, dryers, and dishwashers during this time. Taking these steps can significantly improve comfort and safety during an AC outage.
Preventing the Need for Emergency HVAC Repair
The best way to avoid the stress and expense of emergency HVAC repair is through proactive preventive maintenance. Just like a car needs regular check-ups, your AC system benefits from consistent care to ensure optimal performance and longevity.
We strongly recommend scheduling seasonal tune-ups, ideally in early spring before the cooling season begins. During these professional inspections, a technician will clean coils, check refrigerant levels, inspect electrical components, lubricate moving parts, and identify potential issues before they escalate into major breakdowns. This routine service can improve your system’s efficiency by 5 to 15 percent and extend its lifespan.
Beyond professional tune-ups, homeowners can implement a few best practices:
- Filter Schedules: Change your air filter regularly. While HVAC filters last 3 to 12 months, consider monthly changes if you have pets, allergies, or high usage. A clean filter is critical for maintaining good airflow and preventing issues like frozen coils and compressor strain.
- Coil Cleaning: Keep your outdoor condenser unit clear of debris like leaves, grass clippings, and dirt. Maintain at least a three-foot clear radius around the unit. Periodically, gently hose down the condenser coils with a garden hose (after turning off power to the unit) to remove accumulated grime, which can hinder heat dissipation.
- Clearance Maintenance: Ensure all indoor and outdoor units have adequate clearance. Keep furniture and plants at least two feet from indoor vents and registers.
- Programmable Thermostats: Upgrade to a programmable or smart thermostat. These devices allow for better energy management and can help prevent system overuse, which contributes to wear and tear.
By adhering to these preventive maintenance tips, you can significantly reduce the likelihood of unexpected AC failures, save on energy bills, and ensure your system is ready to keep you comfortable when you need it most.
Frequently Asked Questions About HVAC Emergencies
When your AC system fails, especially during extreme weather, many questions can arise. Understanding what constitutes an emergency and how certain issues impact your system can help you make informed decisions.
What qualifies as an HVAC emergency?
An HVAC emergency is generally defined as any system malfunction that poses an immediate threat to health, safety, or property, or one that causes significant discomfort during extreme weather conditions. This includes situations like a total loss of cooling during a heatwave, a complete heating failure in freezing temperatures, the smell of burning electrical components, the detection of gas or carbon monoxide leaks, or excessive water leakage that could cause structural damage. While a minor issue like a dirty filter might cause discomfort, it usually doesn’t qualify as an emergency unless it leads to one of the more severe symptoms mentioned. Prompt action for these critical issues is essential to prevent further damage or danger.
Can a clogged air filter cause an emergency system shutdown?
Yes, absolutely. A clogged air filter is one of the most common and easily preventable causes of serious AC problems, including emergency shutdowns. When an air filter is heavily soiled, it severely restricts airflow across the evaporator coil. This lack of airflow causes the coil’s temperature to drop too low, leading to ice formation on the coil. As the ice builds up, it further blocks airflow, creating a vicious cycle.
Eventually, the frozen coil can cause the system to struggle, leading to increased pressure and strain on the compressor. Many AC units have safety mechanisms, such as a high-limit switch, that will automatically shut down the system to prevent damage from overheating or over-pressurization. This protective shutdown, while preventing immediate component failure, effectively creates an emergency situation where your AC stops cooling entirely. Ignoring a dirty filter can lead to costly repairs like compressor replacement, making regular filter maintenance a critical preventive measure.
Is it safe to keep running an AC unit that is making loud banging noises?
No, it is generally not safe to keep running an AC unit that is making loud banging noises. Loud banging or clanking sounds are often indicators of significant mechanical failure within the unit. These noises can suggest a loose or broken fan blade hitting other components, a failing motor bearing, or even a damaged compressor.
Continuing to operate a unit with such noises can exacerbate the problem, causing further damage to internal components, potentially turning a repairable issue into a complete system replacement. For instance, a broken fan blade could damage the condenser coil or motor, while a failing compressor can quickly lead to its complete seizure. To prevent additional damage and ensure safety, we recommend immediately shutting down the AC unit at both the thermostat and the electrical breaker if you hear loud banging noises. Then, contact a professional HVAC technician for a thorough diagnosis and repair.
Conclusion
Navigating an unexpected AC breakdown can be stressful, but with the right knowledge, you can approach the situation with confidence. By understanding the common AC troubleshooting tips before calling a pro, you empower yourself to resolve minor issues quickly, saving both time and the cost of an unnecessary service call. From checking your thermostat and air filter to inspecting circuit breakers and the outdoor unit, these initial steps are often all it takes to restore your home’s comfort.
However, recognizing the signs of a true emergency—such as burning smells, electrical sparks, excessive water leaks, or persistent loud noises—is equally crucial. For these serious concerns, prompt action and professional expertise are non-negotiable. Regular preventive care, including seasonal tune-ups and consistent filter changes, remains your best defense against unexpected failures, ensuring your system’s reliability and extending its lifespan. When in doubt, or when your DIY efforts don’t resolve the issue, don’t hesitate to contact a qualified technician. Prioritizing system reliability and prompt action ensures continuous home comfort for years to come.